Solar garden light DIY
My new project is only about electronic. Let’s create a solar garden light on our own.
My references for this one are mainly in french. Thus, here’s the reason of this article I’ll try to detail properly so that anyone who wants to print and make his own solar garden light can follow this guide.
Here’s the list of electronic parts you need:
- QX5252F (datasheet). You can find it here.
- 2 capacitors 1µF
- 1 led whatever the color
- 1 diode 1N5817
- 1 self inductor 47µH (current 75 mA)
- 1 solar panel 2V
- a battery AA 1.2V
Electronic diagram:
Here’s the diagram I took from this site :
Just be aware that if you change the value of the inductor, the current you’ll get will be accordingly with:
There’s an alternative to the QX5252F. Everything you need can be found here !
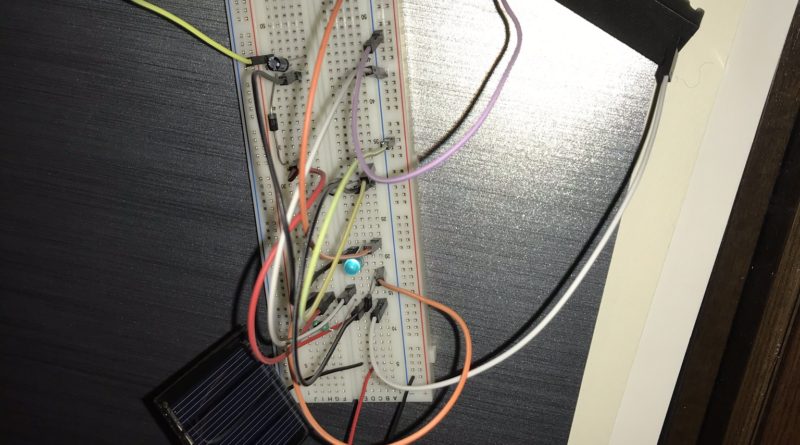
Now, here’s what it looks like wired on a breadboard.
Once you’ve checked that it works, take your soldering iron to transfer your circuit on a PCB board.


You can see that these PCBs were made out from holed copper boards. If you want cleaner work, you can design your PCBs online on the EasyEDA site. This is exactly what I did in second hand and I ordered 5 of those on this same site whose service is called JLCPCB. Making and transportation took 3 weeks but the result is really neat and make my project look very professional.


The cost is really cheap, 2$ for 5 pieces. I even received a 6th as a gift with a pen. Service is just excellent.
Next to come, how to create your own PCB at home with full details.
3D Printing the parts
Now that the circuit is ready, let’s 3D print the parts that will render your solar garden light. You can find an example on my github here.
This garden light is designed to stay outside so it needs to be waterproof. I’ve drawn a little space on which the solar panel can rely (check the red arrow). I’ve used my glue gun to stick the solar panel on that little space. This way, no water or humidity can get into the case by the top. Do the same when joining the top and the bottom parts.
If you don’t have any access to a 3D printer, you might use the services of web sites such as freelabster or 3D Hubs. One of the best way is took check if a Fablab close from your home could print it. Indeed, prices will come free from post fees and moreover you’ll get to know people around you having other interesting projects.
However our work is not over. You can clearly see on the pictures above the stripes and layers of the printed models. This is why a post printing might be interesting. It consists in putting resin (here Epoxy coating) on the model using a brush, more commonly called XTC 3D. For the most curious one, here are the tutos respectively in english and french. Be aware that this product is corrosive, meaning you absolutely need to wear gloves and a mask. But it’ll make your model waterproof. Finally, I’d advise you to have two layers spaced by one hour for a better render.
I hope this article will help you designing your solar garden lights and you’ll have fun making it yourself !
![]() Solar garden light DIY par MadeInFck est sous Licence Creative Commons Internationale Attribution-Pas d'utilisation Commerciale-Partage à l'identique 4.0 .
Solar garden light DIY par MadeInFck est sous Licence Creative Commons Internationale Attribution-Pas d'utilisation Commerciale-Partage à l'identique 4.0 .


